[转载] iptables配置无SNAT转发所有流量,保留来源真实ip
iptables配置无SNAT转发所有流量,保留来源真实IP
前言
在网络架构中,我们经常需要通过中转机转发流量到后端服务器。传统方案通常使用 SNAT/MASQUERADE 来实现,但这会导致一个严重问题:后端服务器看到的来源IP全部变成了中转机的IP,丢失了真实客户端IP信息。
在网络架构中,我们经常需要通过中转机转发流量到后端服务器。传统方案通常使用 SNAT/MASQUERADE 来实现,但这会导致一个严重问题:后端服务器看到的来源IP全部变成了中转机的IP,丢失了真实客户端IP信息。
这里提供一个“够用且可回滚”的 tinyfecVPN 一键部署脚本:自动安装依赖、拉取/更新源码(含 submodule)、编译 NOLIMIT(无限制)版本、安装二进制到 /usr/local/bin/tinyvpn,并生成/启用 systemd 服务(Server/Client 分开)。脚本全程交互式输入参数,直接写进 ExecStart,重启不丢;部署后默认删除源码目录(带路径保护),机器上只留下 tinyvpn + systemd unit。
这里提供一个“够用且可回滚”的最小 iptables 转发脚本:安装时交互式输入转发目标 IP、需要排除的不转发端口(可多个),并选择入口网卡;其余 TCP/UDP/ICMP 流量统一 DNAT 到后端。由 systemd 托管,重启不丢;一键卸载,出错可干净撤回。
随着Chrome浏览器对Manifest V3的强制要求,许多基于Manifest V2的Chrome扩展都面临着升级的挑战。本文将详细介绍如何将IPIP网站IP信息查询Chrome插件从Manifest V2升级到V3版本,包括遇到的问题、解决方案以及最佳实践。
使用docker compose部署,就俩文件配置好就可以用了
配置账号密码:设置密码认证后,我们在进行拉取镜像时就需要先 docker login登入到我们的自建的代理镜像仓库,然后才可以拉取镜像
用Caddy搭建Docker加速服务, 不用跑docker什么的,直接用就可以了
| |
在 Debian 12 上启用自动更新安全补丁(自动安全更新)通常可以使用 unattended-upgrades 工具来实现。下面是详细步骤:
默认情况下,创建容器如果绑定了端口,则 docker 会自动修改 iptables 打开这个端口。然而 UFW 并不会显示这个规则,这就导致了不管使用 UFW 做什么限制,docker 绑定的这个端口都是开放的。
此配置的主要用途是确保没有人可以绕过Cloudflare或其他安全反向代理提供商对网站发起拒绝服务攻击(DoS)。类似功能可以通过real_ip和其他插件实现,但本文的重点是简化设置,不需要安装插件。
最近想把路由器也接入nezha监控 于是乎研究下了下发现挺简单的
步骤如下
以下操作全部都在openwrt的ssh中执行
20250719 更新增加一键安装脚本,支持一键安装和卸载
20250324 更新
naiveproxy不可以代理udp
| |
| |
| |
| |
| |
| |
Realm 是Rust语言开发的流量转发工具,Realm 比 Gost占用资源更小。
支持多组服务器转发,同时也支持tcp和udp,还有域名解析便捷。
只需要在 /etc.defaults/ddns_provider.conf 文件中加入以下内容:
| |
然后在DDNS配置中选择HE_DDNS,假设主机名是 abc.example.org ,在主机名和用户名都填写 abc.example.org , 密码处填写HE.NET中生成的TOKEN即可
腾讯云的服务器会自动安装云监控、云镜等安全服务,方便在控制台查看产品运行状态等
可以看一下服务器的定时任务:
修改/root/lnmp1.8/tools/backup.sh 备份脚本的几个参数。清注意:如果升级了lnmp一键安装包,此文件应需要再次修改。
| |
| |
| |
| |
账户:Administrator 密码:Teddysun.com 使用Windows徽标+R快捷键打开运行框,输入powershell运行,弹出powershell命名输入窗口,输入以下命令:
研究了下 其实挺简单
dsm7的群晖 启动项管理 变成了 systemd
路径在 /usr/lib/systemd/system/
那么就简单了
ssh登陆群晖 然后切换成root
今天练练手 做一个跳过签名验证的练习
下手的app :
首先拖入AndroidKiller
选择不分析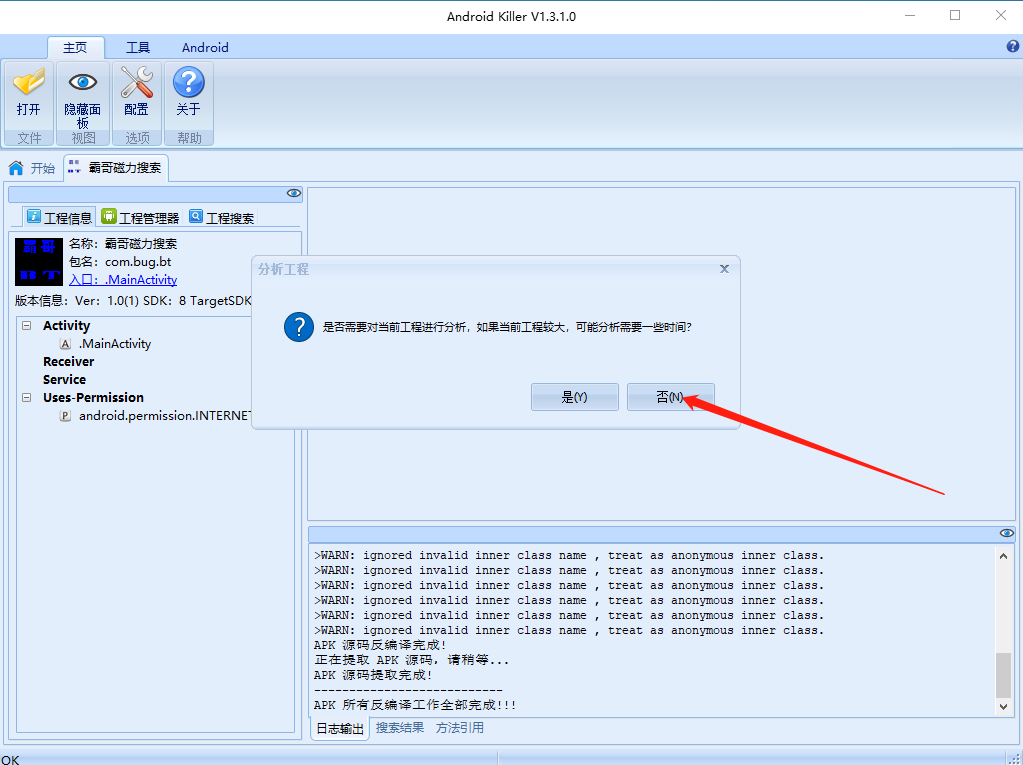
B(Branch) => 分支的意思B 无条件跳转BL 带链接的无条件跳转BX 带状态切换的无条件跳转 根据目标地址最低位切换状态(arm/thumb)BLX 带链接和状态切换的无条件跳转B loc_地址BEQ,BNELDR/STRLDR: 从存储器中加载数据到寄存器中 => LOADLDR R8,[R9,#4],R8为待加载数据的寄存器,加载值为 R9+0x4 所指向的存储单元, 伪代码 R8 = *(R9+4)LDR: 将寄存器的火速据存储到存储区 => StoreSTR R8,[R9,#4],将R8寄存器的数据存储到 R9+0x4指向的存储单元,伪代码: *(R9+4) = R8LDM/STMLDM: 将存储器的数据加载到一个寄存器列表LDM R0,{R1,R3},将R1指向的存储单元的数据一次加载到 R1,R2,R3寄存器STM: 将一个寄存器列表的数据存储到指定的存储器PUSH/POPPUSH: 将寄存器的值压入堆栈 压栈==>POP 将堆栈值弹出到寄存器 出栈<==SWP: 将寄存器与存储器之间的数据进行交换SWP R1,R1 [R0],将R1寄存器与R0指向的存储单元的内容进行交换MOV 将立即数或寄存器的数据传送到目标寄存器MOV R0,#8 => R0 = 8